Yes yes here we go: an article about how to deploy a simple Fast API app on Amazon Serverless complete with automatic deployment when code is merged to the master branch. 🚀🚀🚀
Some background info and research about the topic
The Fast API docs are very good. Deployment is mostly focussed on docker and k8s.
But for serverless there are a couple choices and it also depends on how much of the api gateway you want to
configure yourselves. With Flask I used Zappa which does the heavy lifting: after a setup with a wizard you can
re-deploy your app with zappa update.
I did some googling and tried to use Zappa but it doesn’t work with Fast API. Most other setups seem to focus on using mangum.io an adapter for ASGI application to AWS Lambda and API gateway.
An excellent article on the topic which explains how the configure all the stuff by hand:
towardsdatascience.com/fastapi-aws-robust-api-part-1-f67ae47390f9
And a lot of nice written info about an automatic Travis deployment CI + setup of IAM Users and Roles:
iwpnd.pw/articles/2020-01/deploy-fastapi-to-aws-lambda
This blog post will focus more on the boilerplate itself and will also have info about how to setup postgres via
Amazon RDS. The idea is that you whilst copy pasting from this walk trough you replace most occurrences of
boilerplate in this with your-project-name so you get the naming all uniform.
Setup a deployment
First, we set up a role that the AWS Lambda will assume within our AWS account. Roles are AWSs way to enforce the
principle of least privilege when it comes to the resources an AWS Lambda can execute or have access to. Go to the
IAM console, select Roles and Create. That’ll take you into the Role
creation screen where you will choose an AWS service as the trusted entity and select Lambda as the service that will
use the role we’re going to create. Press next and it’ll take you to the Permissions tab. Here you can either create
a permission policy from scratch or select one of the existing ones. Keep in mind that the permissions vary
depending on the purpose of the Lambda function. We’ll take an existing permission for now. Search for lambda and
select the AWSLambdaBasicExecutionRole which only allows our Lambda to write logs to AWS Cloudwatch. The project I’m
using also need Postgres so I also selected: AmazonRDSDataFullAccess
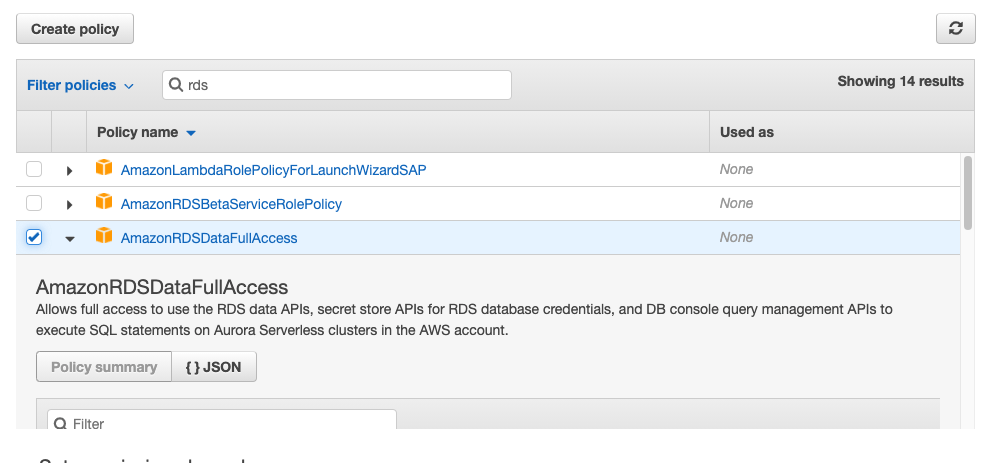
Press next, give it a tag or don’t and press Review. Now you’re prompted to give it a name. Choose a meaningful name (e.g. fastapi-postgres-boilerplate) and continue to create the role, which takes you back to Roles where you click your newly created role and mark down the Role ARN; the Amazon Resource Name, which you will be used as an identifier for your deploy.
Create a bucket
This is not strictly needed, as small apps can be served with a bucket; but if your zipped app grows the files can be stored in a S3 bucket. So let’s set one up:
Setup a Travis User in AWS
Next up we create a new AWS user that Travis can use to perform actions on AWS resources on our behalf. We could just use our encrypted credentials and secret, but we follow the principle of least privilege again. This way the Travis user will stick to creating AWS Lambdas only First, we will create a new policy.
Now create a new IAM user. Continuing, you go to the IAM console, but this time you will create a user with
programmatic access and a meaningful name such as fastapi-postgres-boilerplate-user or the likes. Now we attach the
policy we just created to the Travis user. We get prompted with the AWS-ACCESS-KEY-ID and the AWS-SECRET-ACCESS-KEY
of the user. Note those down for now.
Preparing your Fast API app
You can use fastapi-postgres-boilerplate to see what I needed to do to serve the app with mangum. Basically it’s the one-liner at the bottom of main.py.
Give it a spin locally:
or use the Dockerfile:
Setup and use SAM
The AWS Serverless Application Model, aka AWS SAM, is an open-source framework to build the runtime for a serverless
applications. As an extension to AWS Cloudformation it integrates nicely with all the other AWS services we need and
lets us build our infrastructure from code: from the template.yml in the project folder.
Install SAM
Check out the official Template Anatomy to get a better understanding of other options available.
Note: It needs/uses a requirements.txt file in the root of the project.
When that all succeeds you can build a deployment package with:
Deploy:
If all went OK you’ll see something like this:

Now you can go to the API Gateway Console
to check what the dynamically generated name of the new API gateway is. Look for Stage: prod. In the CloudWatch
console you should now also have a new LogGroup containing the logs of this FastAPI instance.
Now your FastAPI instance will be online via a dynamically generated url. Sam automatically adds a “/prod” stage so if you want
to access it via this URL: you;ll need to set the root_path in main.py to /prod or the api docs won’t work. But
it’s probably even better to add a user friendly URL.
You can add a custom URL by creating a mapping in the API gateway console and then adding a new CNAME for the domain name. When your domain is managed by Amazon Route 53 it will auto-renew the SSL certs.
Setup a mapping:
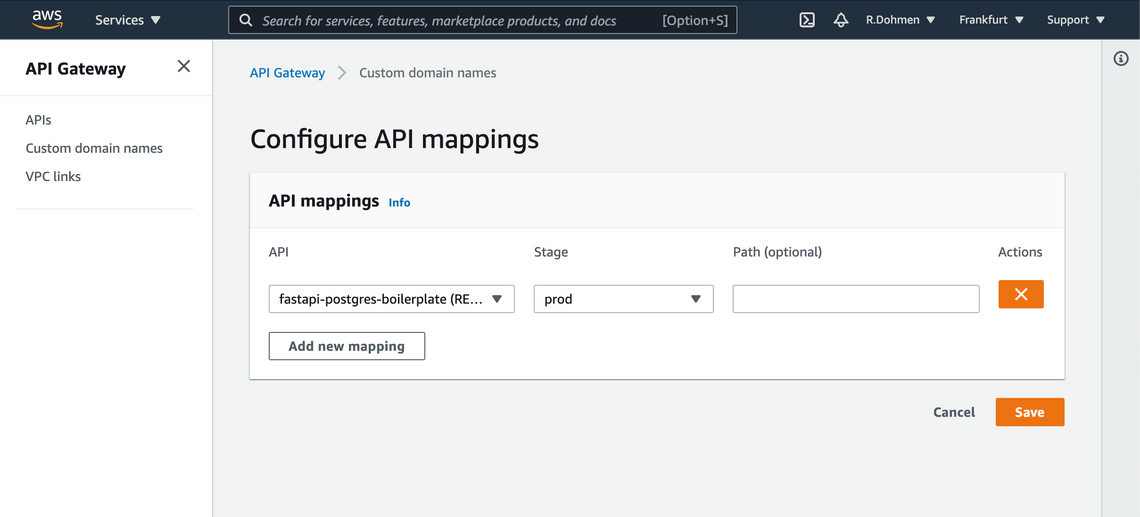
When you now return to the previous screen you can see the cloudfront distribution that this mapping created for you.
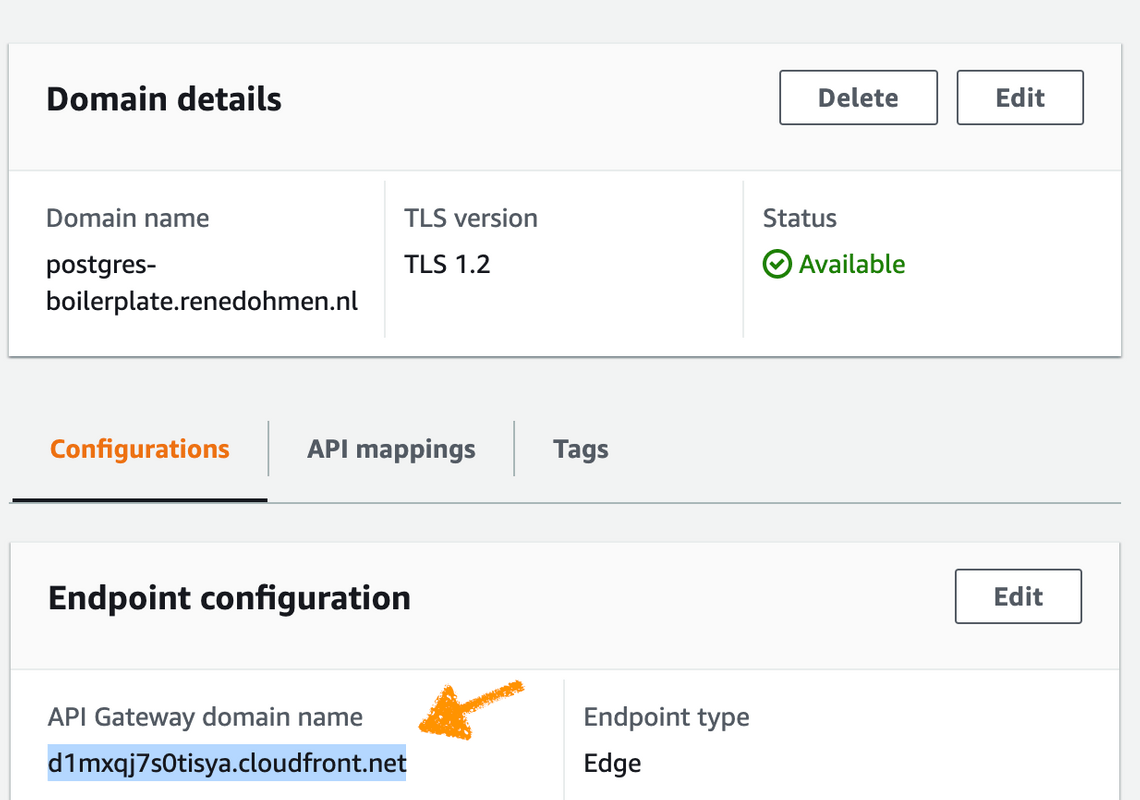
Take a note of the cloudfront name: that’s the name you will need use to for the CNAME pointer.
When all went well, and the CNAME you created isn’t wrongly cached already somewhere in the DNS client, the api docs
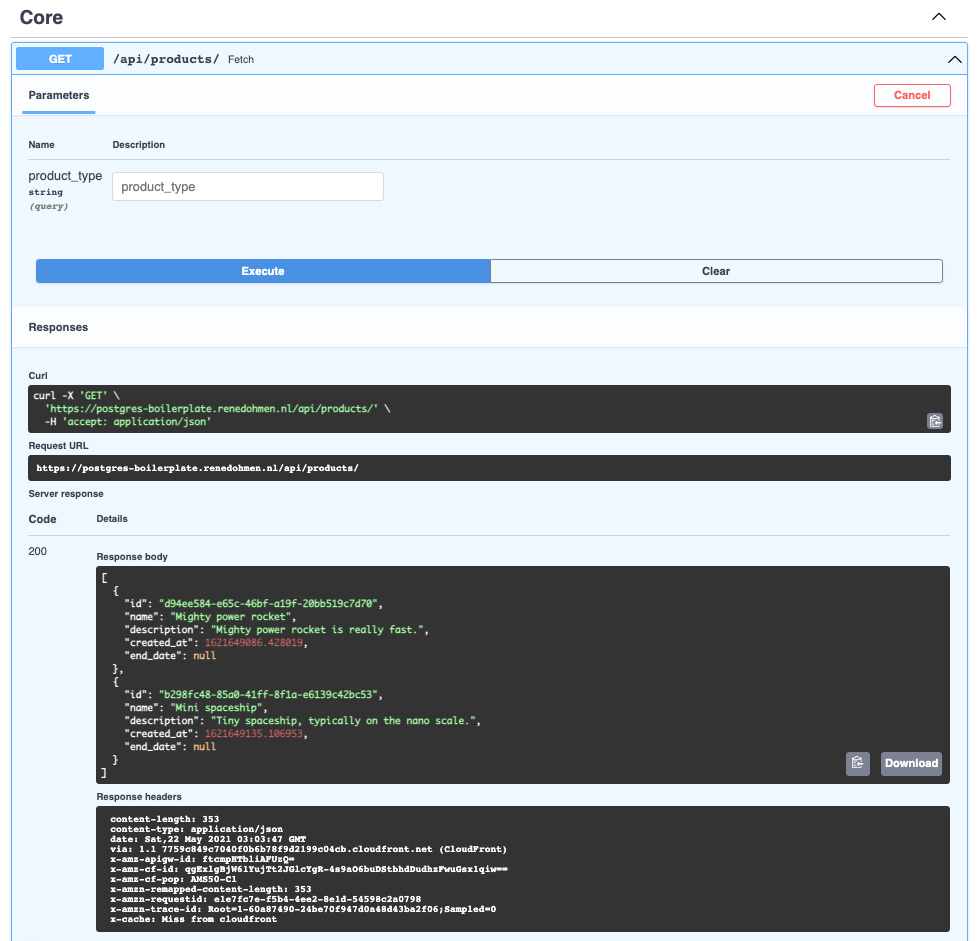
and ping endpoint will be available on these URL’s:
But as the database doesn’t exist yet it will mainly serve error 500’s.
Setup Amazon RDS for PostgreSQL
Probably best to setup a separate RDS instance just for this app. But I don’t want to be too opinionated; if you want to add all companies DB’s under one RDS instance that’s also fine (I think). Create a new RDS PotsgreSQL instance:
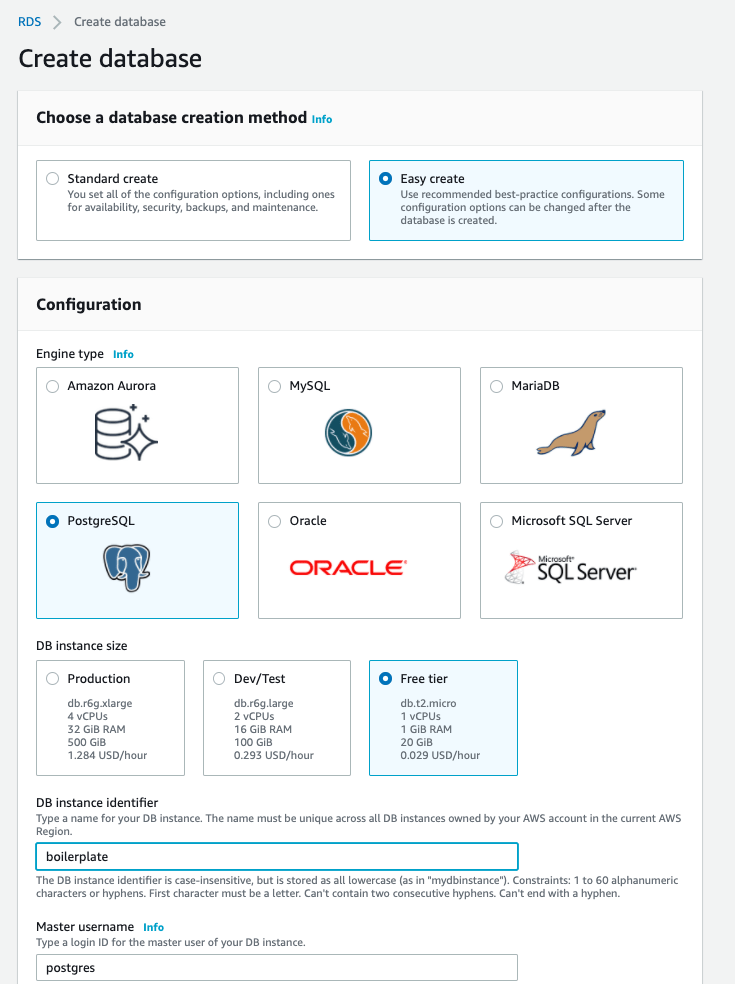
Set it up for Postgres 12 in a region near you. The Free tier will be enough for this experiment. Also ensure that
you setup a Master username and Master password and note it down somewhere. After that you will need to lookup the
Endpoint that amazon created. You can do that in the RDS console, under Databases. It will look something
like: boilerplate.cogvbar6jpcc.eu-central-1.rds.amazonaws.com
The remainder of this step can be executed from the terminal.
I assume that you have the necessary PostgreSQL tools, like
psqlandcreateuser, installed locally.
- Create DB and User
- Setup permissions
You will be prompted for your postgres master password; and when everything went ok you will be in a postgres prompt. Type these SQL commands:
Now ensure that new tables will also have correct permissions:
SQL
Quit the psql client and test if you can now connect to your DB with the new user:
- Victory looks like this:

You can now create the tables and populate it with data. As I still don’t have a good way to init this; I often use a
locally running fastapi instance that get its DATABASE_URI from and .env file.
Note: the first time I started it the uuid extensions was missing and I had to connect once with the postgres master user as the boilerplate user doesn’t have enough permissions to install extensions
Configure the ENV vars
The easiest way to work with persisting ENV var:
Ready for re-deploy
Build, Upload and Deploy your new stack. When you forked the
git hub project you can easily adapt the deploy.sh to
trigger or test a manual deploy. When that works OK you setup Travis or Github actions to autodeploy when stuff occurs
in the master branch.
NOTE: this blog post isn’t finished yet and the fastapi boilerplate tests indicate that at least saving of products isn’t working yet..
Related Posts
Quick Links
Legal Stuff
